TL;DR: This guide demonstrates how to set up conventional commits with a customizable Jira ticket prefix for JavaScript projects. It covers configuring commit message validation using git hook, ensuring better commit practices and issue tracking. The guide also briefly touches on Jira-GitLab integration to enhance traceability in your development workflow.

Table of Contents
- Table of Contents
- Prerequisites
- Step 1: Install Commitlint and Husky
- Step 2: Commitlint Configuration
- Step 3: Set Up Husky
- Step 4: Using Conventional Commits with Jira Integration
- Step 5: Integrating with GitLab
- Best Practices and Tips
- Troubleshooting Common Issues
- Conclusion
Prerequisites
Before diving in, ensure you have the following:
- A Git repository (GitLab, GitHub, etc.)
- Node.js installed
- A package manager:
pnpm,npm, oryarn(pnpmis used in the examples) - A Jira account with a project set up (for the last section)
Step 1: Install Commitlint and Husky
First, install the necessary dependencies:
pnpm add -D @commitlint/config-conventional @commitlint/cli husky💡 Tip: If you prefer
npmoryarn, use the appropriate command:# npm npm install --save-dev @commitlint/config-conventional @commitlint/cli husky # yarn yarn add --dev @commitlint/config-conventional @commitlint/cli husky
Step 2: Commitlint Configuration
2.1 Basic Configuration
After installing Commitlint, start with a basic configuration. Create a commitlint.config.mjs file in your project root with the following content:
export default {
  extends: ["@commitlint/config-conventional"],
};
This basic configuration extends the default rules provided by @commitlint/config-conventional.
2.2 Default Rules
The @commitlint/config-conventional package includes a set of default rules that enforce the Conventional Commits standard. Some key default rules include:
type-enum: Enforces specific commit types (e.g., feat, fix, docs).type-case: Ensures the type is in lowercase.type-empty: Disallows empty type.subject-case: Controls the case of the subject line.subject-empty: Disallows empty subject line.subject-full-stop: Disallows a period at the end of the subject line.
You can view the full list of default rules in the @commitlint/config-conventional documentation.
2.3 Overriding Rules
It’s possible to override or extend the default rules by adding a rules object to the configuration. For example:
export default {
  extends: ["@commitlint/config-conventional"],
  rules: {
    "type-enum": [
      2,
      "always",
      [
        "feat",
        "fix",
        "docs",
        "style",
        "refactor",
        "perf",
        "test",
        "chore",
        "revert",
      ],
    ],
    "subject-case": [0], // Disables the subject-case rule
    "header-max-length": [2, "always", 72],
  },
};
This example customizes the allowed types, disables the subject-case rule, and sets a maximum header length.
2.4 Rules vs Plugins
-
Rules: Rules are predefined checks that Commitlint applies to commit messages. They are configured directly in the
rulesobject of the configuration file. -
Plugins: Plugins allow adding custom functionality to Commitlint. They can define new rules or modify existing ones. Plugins are typically used for more complex validations that can’t be achieved with standard rules alone.
2.5 Adding Custom Rules with Plugins
For Jira ticket validation, a custom plugin can be used. Here’s the complete configuration with a custom rule:
export default {
  extends: ["@commitlint/config-conventional"],
  plugins: [
    {
      rules: {
        "jira-ticket": (parsed) => {
          const { subject } = parsed;
          const ticketPattern = /^(\b[A-Z]+-\d+\b\s+)?(.+)$/;

          if (!subject) {
            return [false, "commit message subject is required"];
          }

          const match = subject.match(ticketPattern);

          if (!match) {
            return [false, "invalid commit message format"];
          }

          const [, ticketWithSpace, description] = match;

          if (ticketWithSpace) {
            const ticket = ticketWithSpace.trim();
            if (!/^[A-Z]+-\d+$/.test(ticket)) {
              return [false, "invalid Jira ticket format (e.g., PROJ-123)"];
            }
          }

          if (!description || description.trim().length < 3) {
            return [false, "commit message must include a description"];
          }

          if (description !== description.toLowerCase()) {
            return [false, "description must be in lowercase"];
          }

          return [true];
        },
      },
    },
  ],
  rules: {
    "jira-ticket": [2, "always"],
    "subject-case": [0], // Disable the default subject-case rule
    "type-enum": [
      2,
      "always",
      [
        "feat",
        "fix",
        "docs",
        "style",
        "refactor",
        "perf",
        "test",
        "chore",
        "revert",
      ],
    ],
    "header-min-length": [2, "always", 10],
    "subject-min-length": [2, "always", 5],
    "type-case": [2, "always", "lower-case"],
    "header-max-length": [2, "always", 72],
    "subject-full-stop": [2, "never", "."],
  },
  parserPreset: {
    parserOpts: {
      headerPattern: /^(w+)(?:(([^)]+)))?: (.+)$/,
      headerCorrespondence: ["type", "scope", "subject"],
    },
  },
};
This configuration:
- Extends the conventional commit configuration.
- Adds a custom ‘jira-ticket’ rule via a plugin.
- Overrides several default rules to accommodate the Jira ticket format.
- Defines a custom parser preset to correctly split the commit message.
2.6 Examples of Valid and Invalid Commits
Now that the configuration is set up, here are some examples of valid and invalid commits:
Valid Commits:
-
feat(ui): PROJ-123 add mind-reading feature to user preferences- ✅ Valid format with Jira ticket and lowercase description
-
fix: resolve quantum entanglement in coffee machine- ✅ Valid format without Jira ticket
-
docs(readme): UX-456 update time travel safety warnings- ✅ Valid format with different Jira project key
-
chore: teach ai to make coffee while updating dependencies- ✅ Valid format without Jira ticket
-
refactor(core): PROJ-101 optimize flux capacitor efficiency- ✅ Valid format with scope and Jira ticket
-
feat: add ability to predict lottery numbers- ✅ Valid format without Jira ticket
Invalid Commits:
-
PROJ-234 Add teleportation feature- ❌ Missing commit type
-
feat(api): proj-345 implement telepathic api calls- ❌ Jira ticket not in uppercase
-
Fix: PROJ-456 Resolve Paradox In Time Machine- ❌ Type should be lowercase, and description should be all lowercase
-
chore(db): PROJ-567 Upgrade to quantum database- ❌ Description should be all lowercase
-
PROJ-678 feat: add invisibility cloak to user profile- ❌ Jira ticket should come after the type and scope
-
docs: Update manual on handling parallel universes PROJ-789- ❌ Jira ticket should be at the beginning of the subject, not the end
-
feat: Add Ability To Predict Lottery Numbers- ❌ Description should be all lowercase
Remember, while these examples are meant to be fun, maintaining consistent and clear commit messages is crucial for effective collaboration and project management. Even if you’re working on mind-bending features like time travel or quantum computing, your commit messages should always be down-to-earth and easy to understand!
ℹ️ Note: According to this configuration, the Jira ticket is optional. Commits with or without a Jira ticket are valid as long as they follow the other rules (correct type, lowercase description, etc.)
Step 3: Set Up Husky

Initialize Husky to initialize a commit message hook:
pnpm husky installAnd update .husky/commit-msg:
#!/bin/sh
. "$(dirname "$0")/_/husky.sh"

npx --no-install commitlint --edit "$1" || {
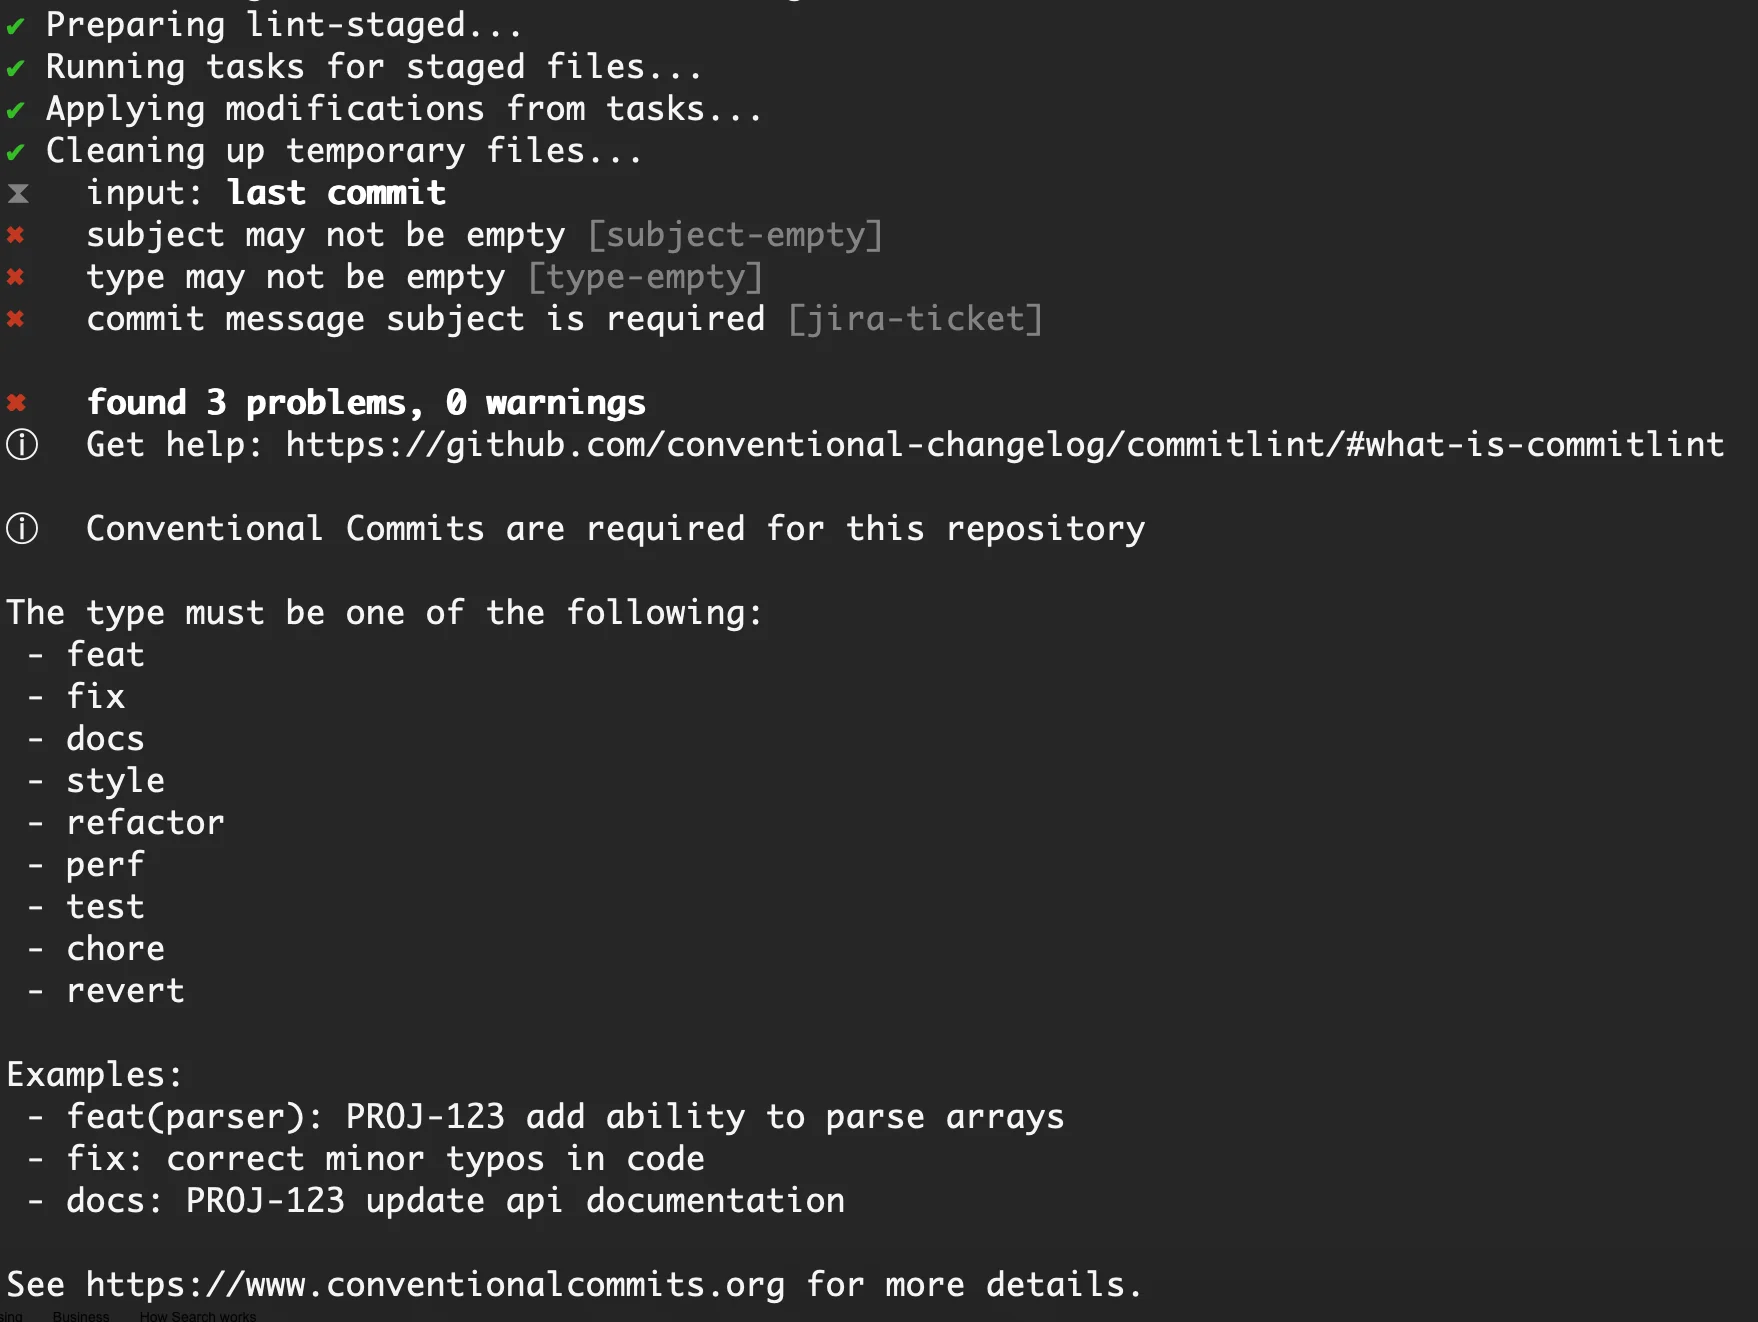
  echo "ⓘ   Conventional Commits are required for this repository

The type must be one of the following:
 - feat
 - fix
 - docs
 - style
 - refactor
 - perf
 - test
 - chore
 - revert

Examples:
 - feat(parser): PROJ-1234 add ability to parse arrays
 - fix: correct minor typos in code
 - docs: PROJ-5678 update api documentation

See https://www.conventionalcommits.org for more details
  "
  exit 1
}
This setup includes a detailed error message that is displayed when a commit fails the validation. The message serves several purposes:
- It reminds developers about the requirement for Conventional Commits
- It lists all the allowed commit types, helping developers choose the correct one
- It provides clear examples of valid commit messages, including ones with and without Jira tickets
- It directs developers to the contribution guidelines for more information
This descriptive message helps reduce confusion and frustration, especially for developers who are new to the project or to Conventional Commits. It serves as an immediate, contextual guide right at the moment when a developer needs it most - when their commit has been rejected.

Step 4: Using Conventional Commits with Jira Integration
Now you can use commit messages with or without Jira ticket references:
# With Jira ticket:
git commit -m 'feat(auth): PROJ-1234 implement two-factor authentication'

# Without Jira ticket:
git commit -m 'chore: update dependencies'
Step 5: Integrating with GitLab
As a final step, integrating GitLab with Jira can further enhance your development workflow by linking commits directly to Jira tickets.
Setting up the Integration
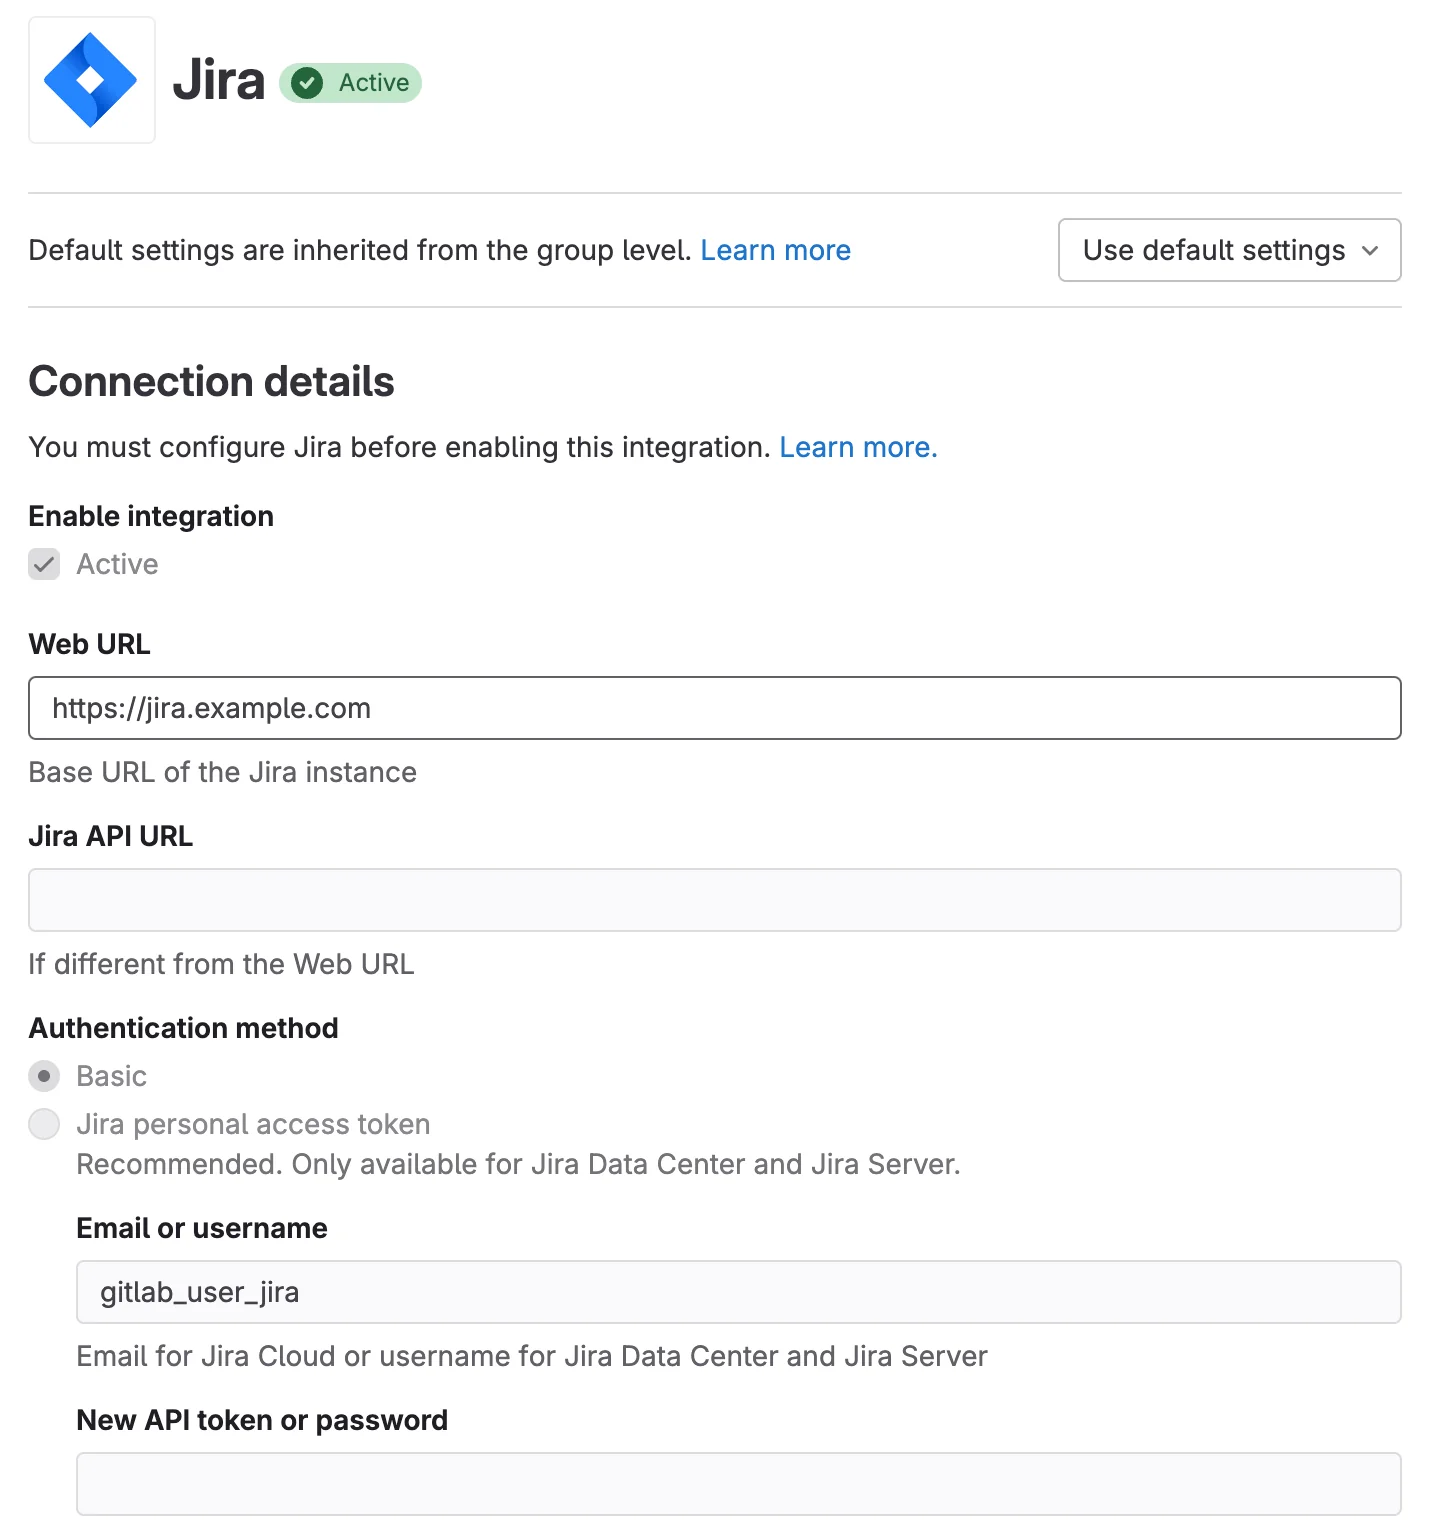
To set up Jira integration in GitLab:
- Go to your GitLab repository settings.
- Navigate to Integrations > Jira.
- Fill in the details:
- URL: Your Jira instance URL
- Username: Your Jira email
- Password/API Token: Your Jira API token
- Project Key: Your Jira project key
- Test and save the settings.

Benefits and Usage
Once set up, this integration offers several advantages:
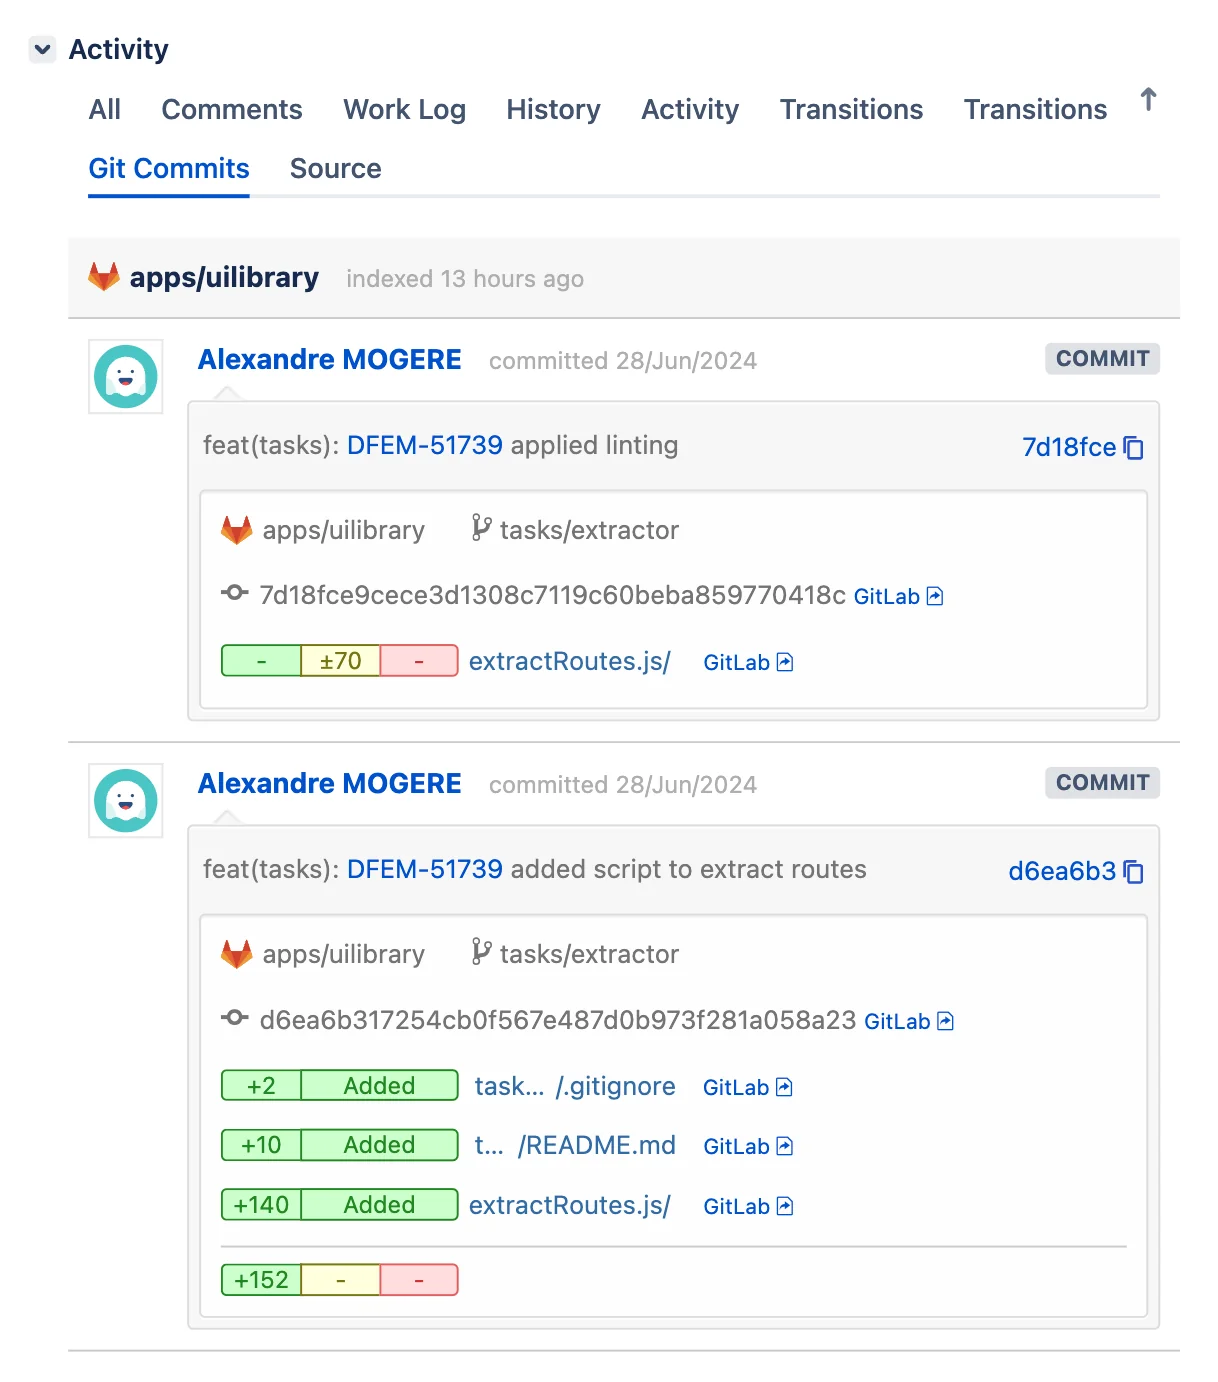
- Automatic Issue Linking: Including a Jira issue key (e.g., PROJ-123) in your commit message automatically creates a link to that issue in Jira.

- Commit Visibility in Jira: Linked commits are visible in the Jira ticket’s “Development” section, providing context within the ticket.

By leveraging this integration, you create a more connected workflow between your project management in Jira and your code management in GitLab, enhancing traceability and team collaboration.
Best Practices and Tips
- Consistent Naming: Use consistent Jira project keys across your organization.
- Descriptive Messages: Write clear, concise commit messages that explain the “why” behind changes.
- Atomic Commits: Make small, focused commits that address a single concern.
- Branch Naming: Consider using Jira ticket numbers in branch names for easier tracking.
- Code Reviews: Enforce commit message standards during code reviews.
Troubleshooting Common Issues
- Commit Rejected: Ensure your commit message follows the correct format.
- Husky Not Running: Check that Husky is properly installed and initialized.
- Uppercase Letters in Description: Remember, the description after the Jira ticket must be in lowercase (following default commitlint rule).
Conclusion
By following these steps, you have set up a robust commit message enforcement system with pnpm, integrated Jira with your repository, and enforced conventional commits with customizable Jira ticket prefixes. This setup not only improves commit message practices but also ensures that every commit is linked to the relevant Jira ticket, enhancing traceability and project management efficiency.
For those looking to take commit message standardization even further, consider exploring Commitizen. This tool provides an interactive command line interface that guides developers through the process of creating properly formatted commit messages. It can work alongside the setup described in this article, offering an additional layer of guidance and control over your commit messages.
🎭 Anecdote: Speaking of “last commits”, I once knew a developer who committed about a dozen times with the message “last commit” on a single Merge Request. Perhaps we should consider adding a “no, really, this is the last commit” type to our conventional commits list… 😉
Remember, clear commit messages make everyone's life easier, and linking commits to Jira tickets keeps your project organized and your team informed. And please, try to avoid being the "last commit" developer - your team will thank you! Now go forth and commit with style! 💪
Explore More
